
Follow the steps below to log in to your eDialer agent interface and perform a quick call transfer. You can also Watch the video ▶ for a full walkthrough.
Quick Call Transfer: Step-by-Step
-
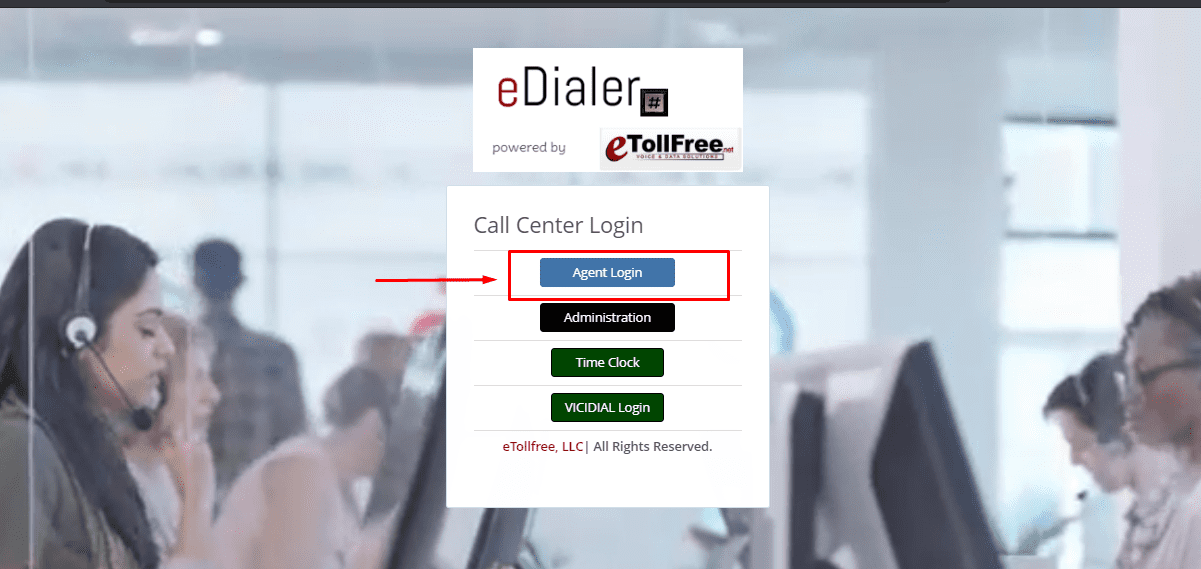
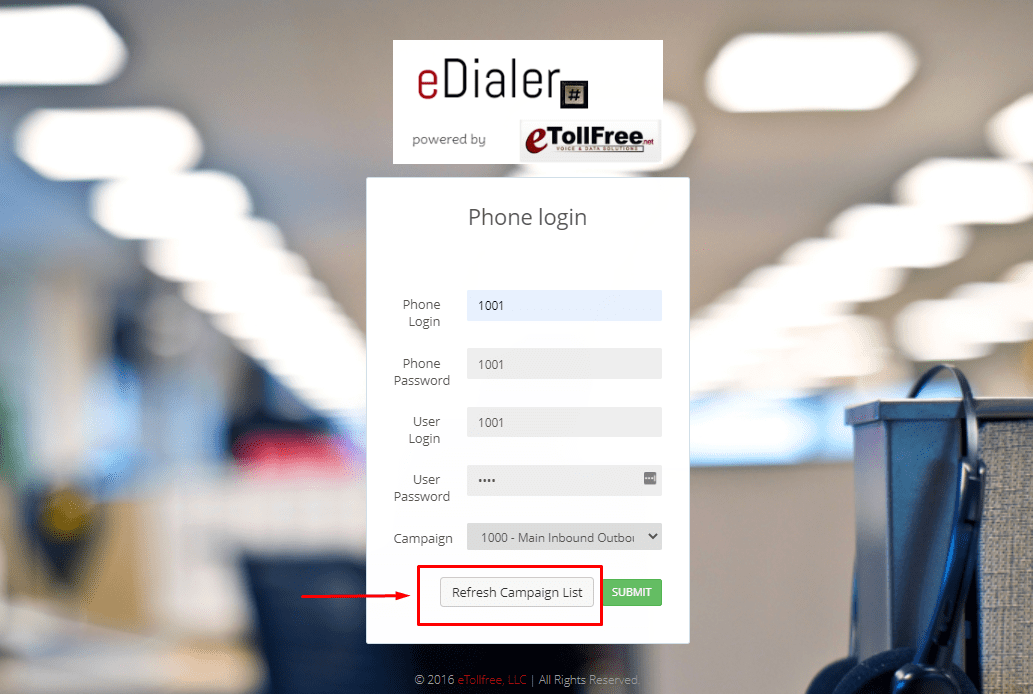
From the welcome page, click Agent Login.
-
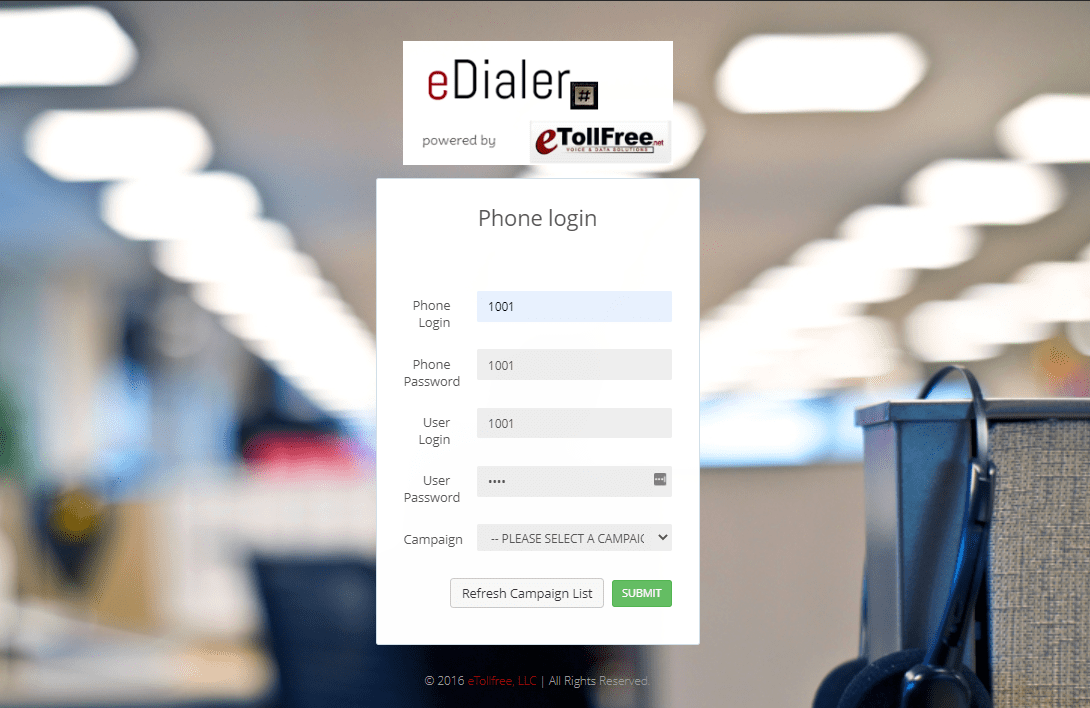
Type in your Phone and user credentials.
-
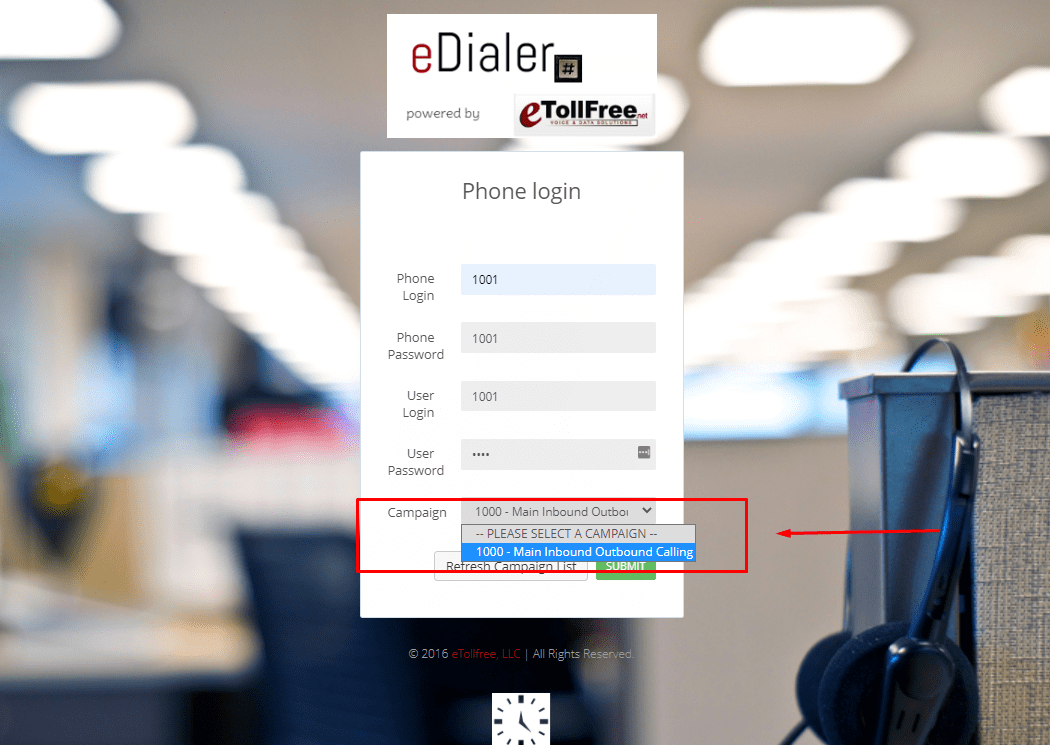
Choose the campaign from the dropdown.
-
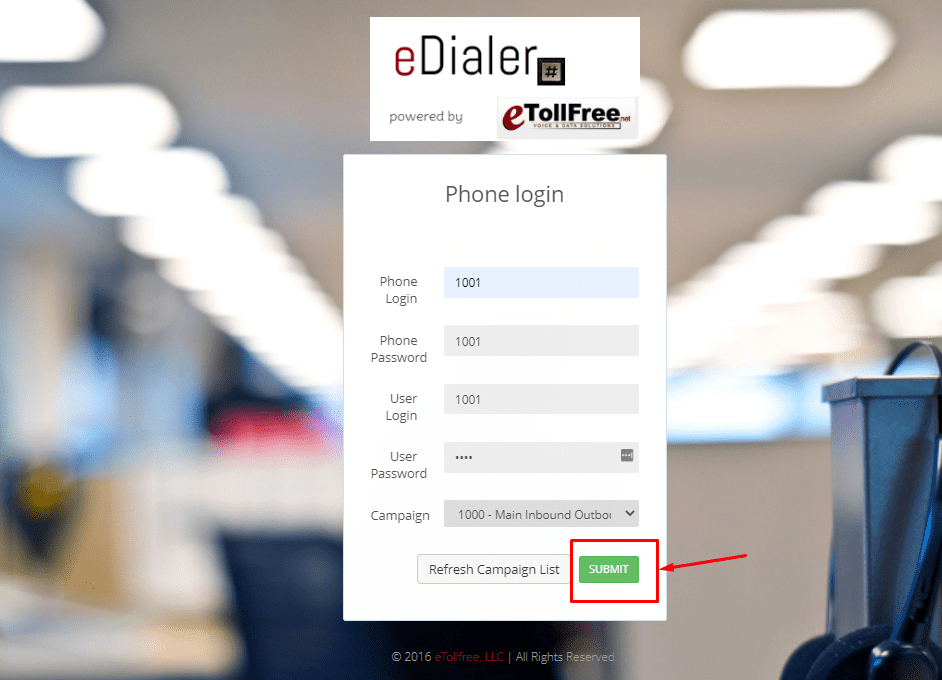
Then, click Submit.
-
If the campaign dropdown is not showing any campaign options, click Reset Campaign List.
-
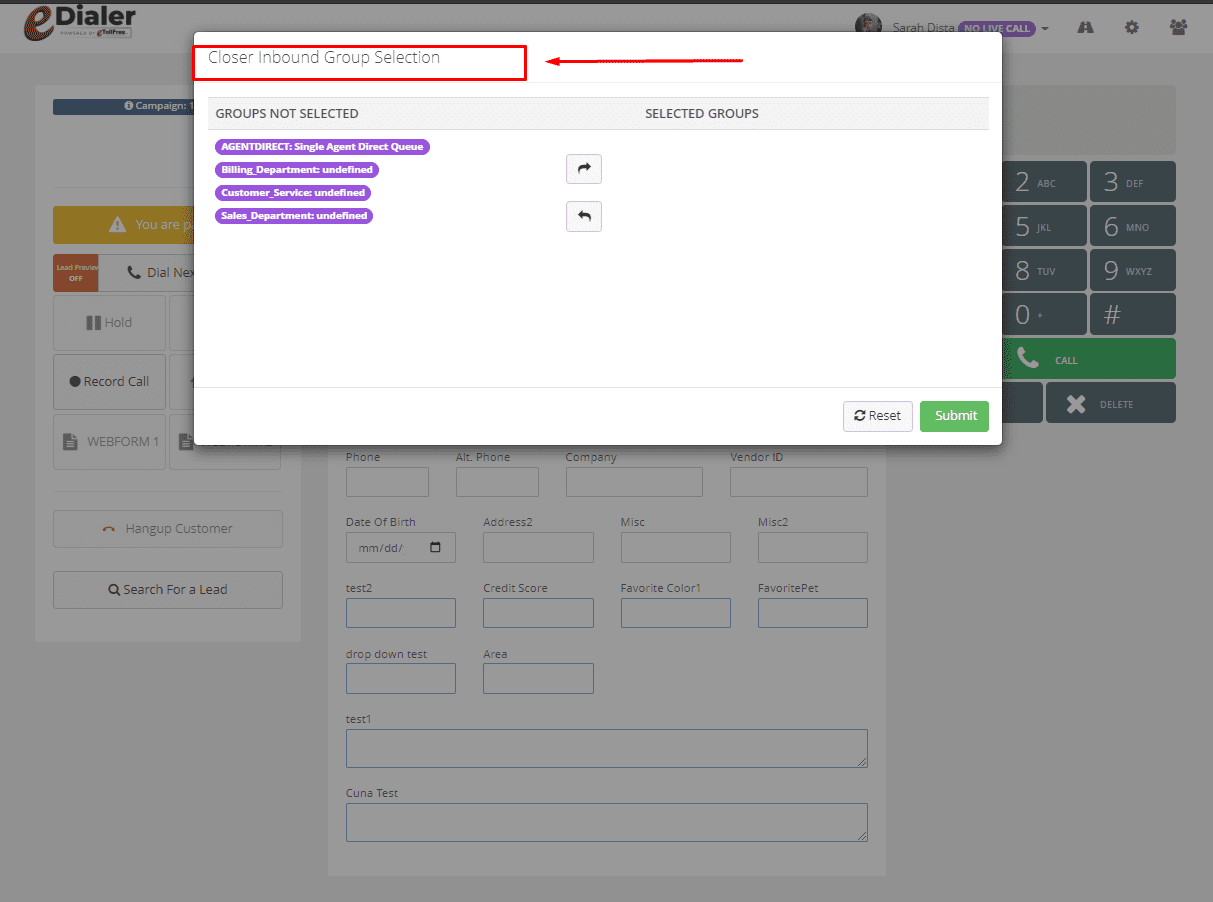
If your eDialer is set to receive incoming calls, you will see the pop-up screen: “Closer Inbound Group Selection”.
-
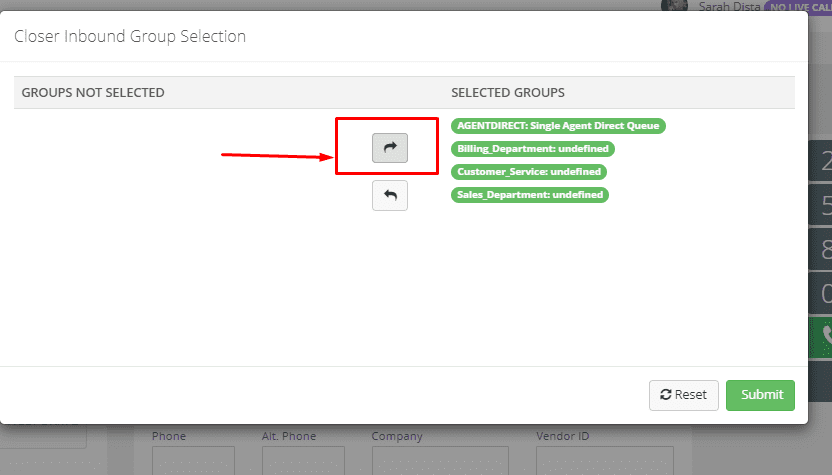
Choose the ingroup or incoming group assigned to you, or select all by clicking the right arrow button.
-
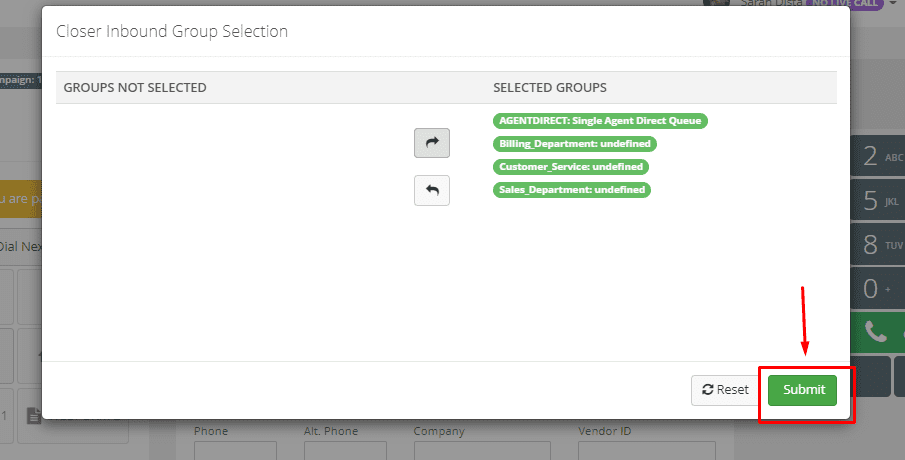
Then, click Submit.
-
The Transfer button is only clickable when you are on a live call. Otherwise, it will remain greyed out.
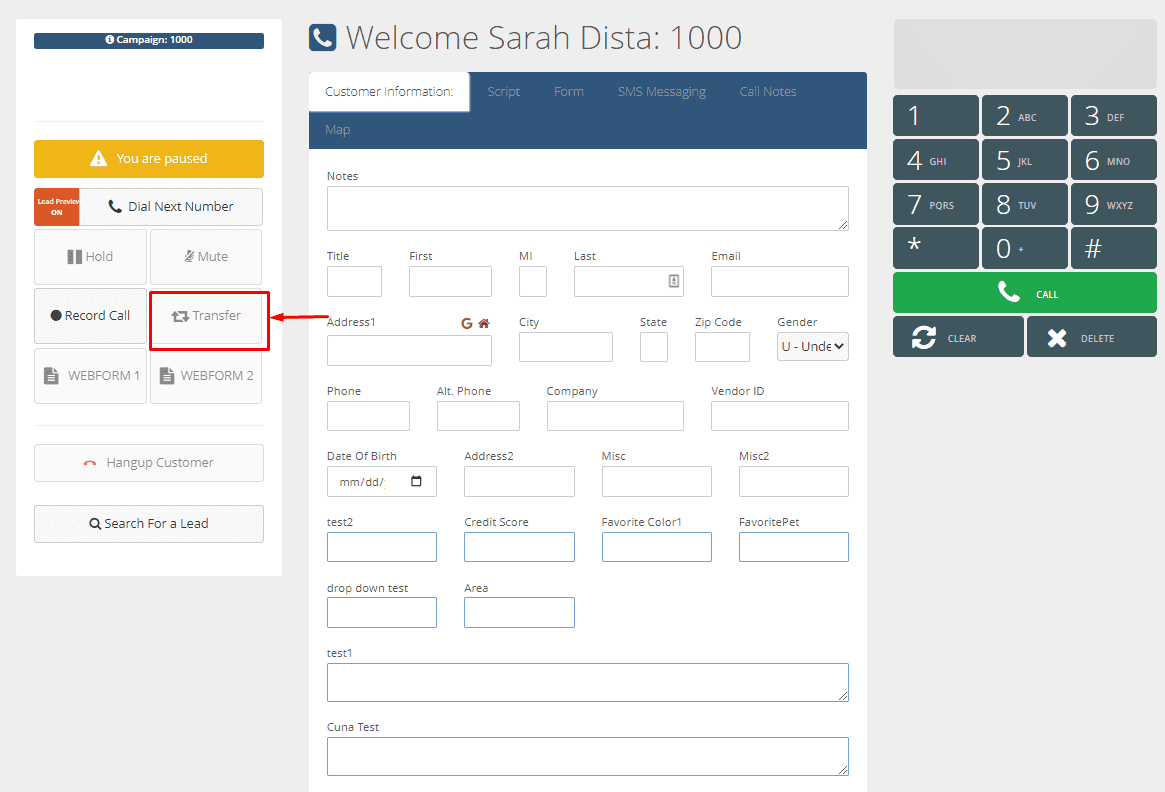
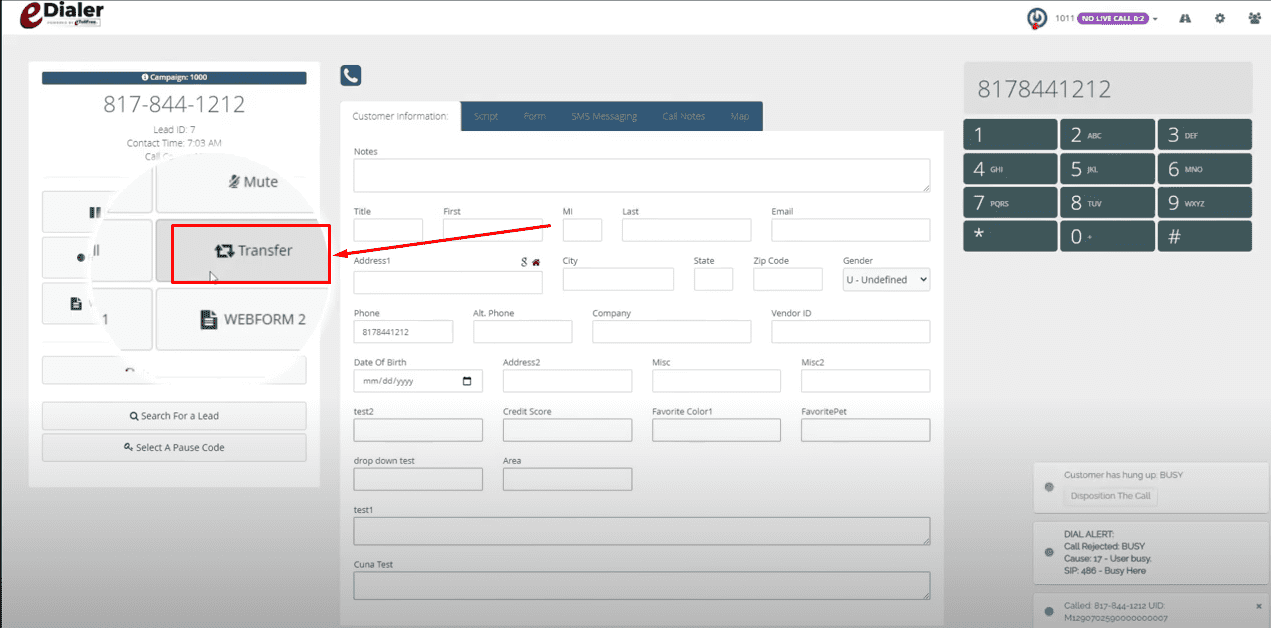
Once you receive a live call, click the Transfer button on the left to begin the transfer process.
-
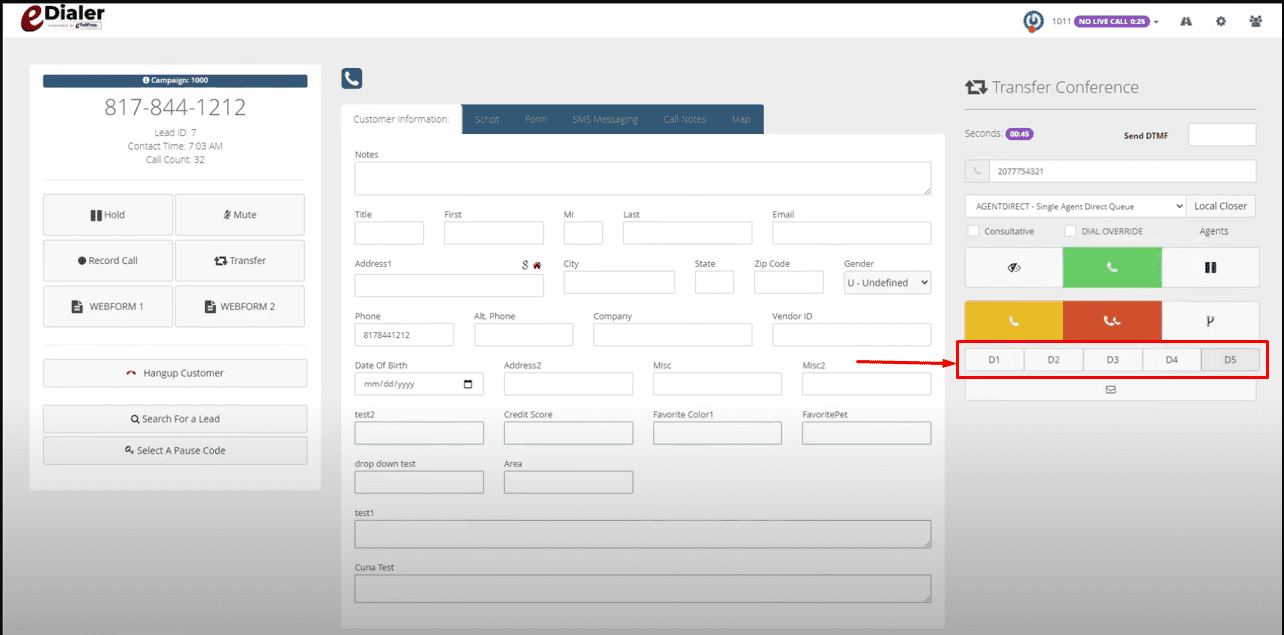
At this point, you can either keep the caller on the line or place them on hold by clicking the “Hold Customer” button. The Transfer Conference options will appear on the right side of the screen.
-
If a Quick Transfer is set up in eDialer, you can click any button from D1 to D5 and it will auto-populate the saved number into the Number to Call field.
-
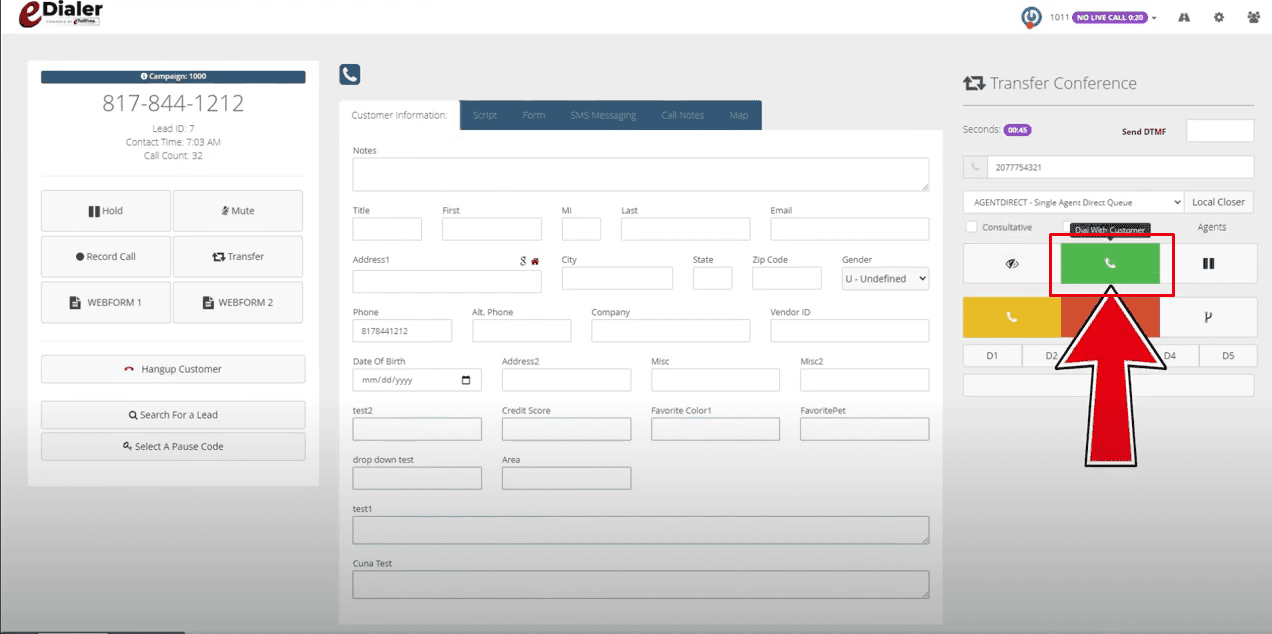
When the number populates, click the Green “Dial with Customer” button.
-
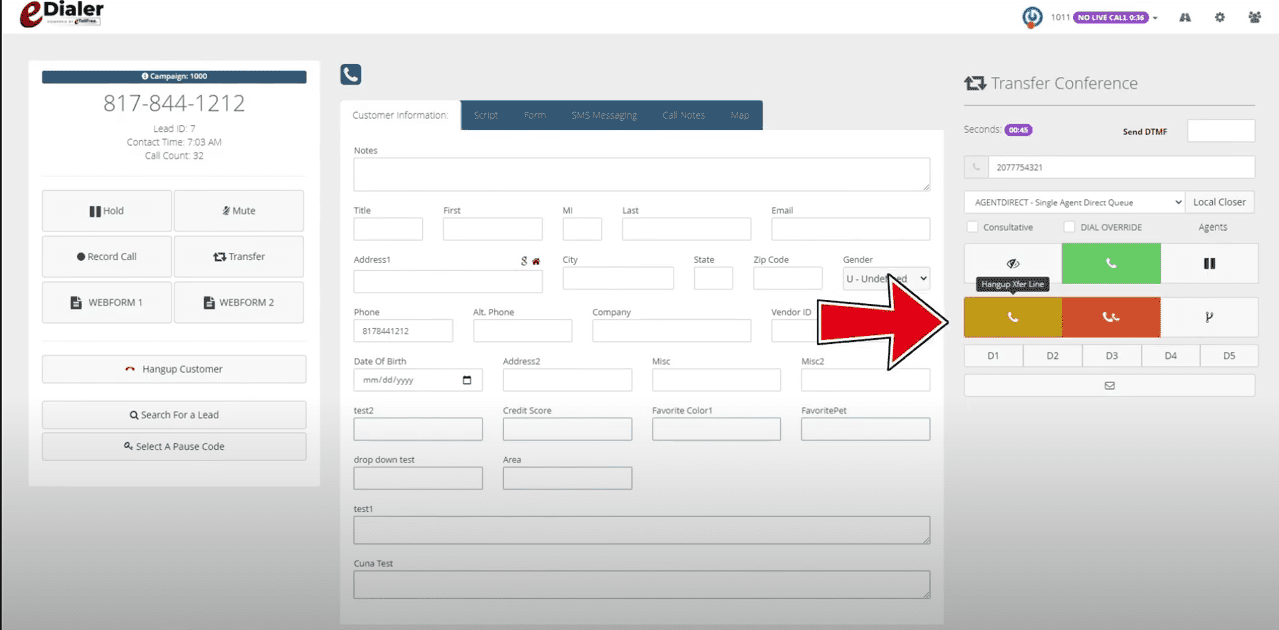
If you need to hang up the transfer line, click the orange “Hangup Xfer Line” button.
-
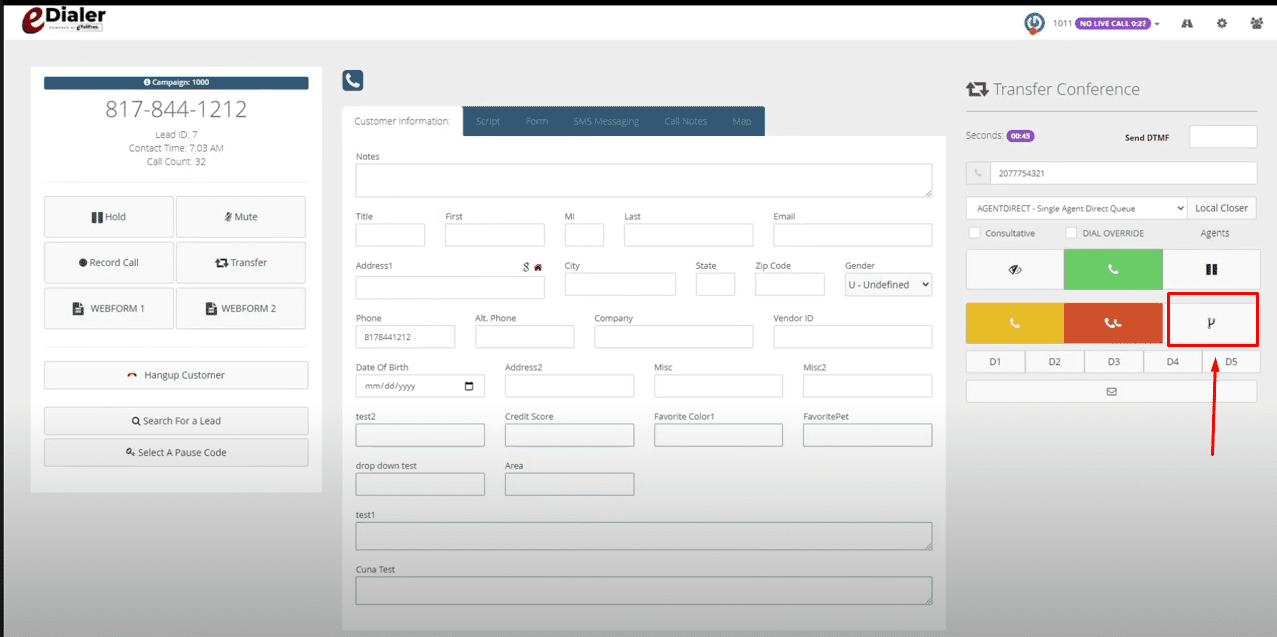
Once the transfer number connects to the caller or customer, click the “Leave 3-Way Call” button next to the red Hangup Call button.
-
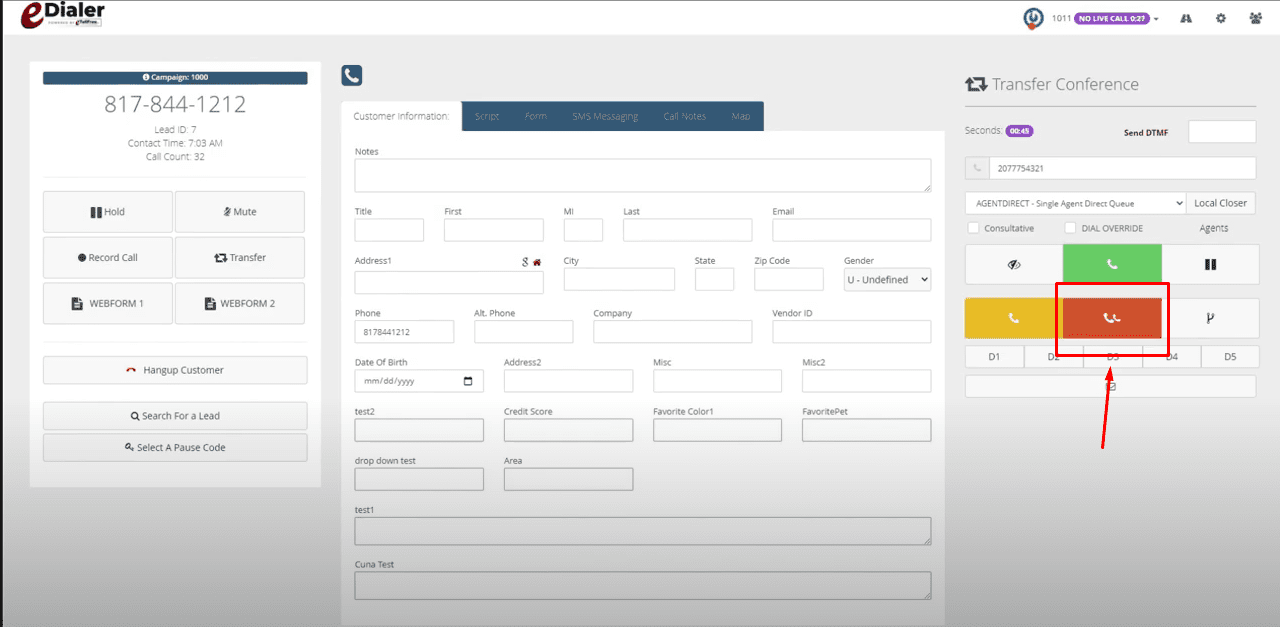
To hang up both lines, click the red Hang Up button.
-
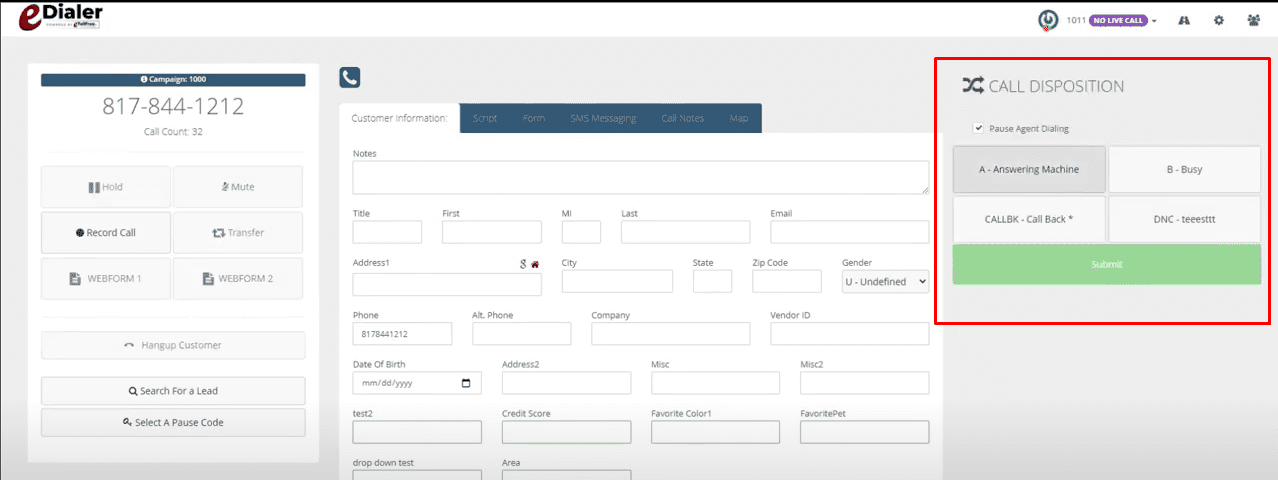
Finally, disposition the call with the correct status.
Need Help Setting Up Your Call Center?
eTollFree offers fully hosted VICIdial call-center solutions, toll-free numbers, and business VoIP services for US and Canadian businesses. Our team is ready to help you get set up and transferring calls with confidence.
Questions? Call our customer service team at 866-273-4639 or reach our sales team at 1 (800) 233-0234.
Simple, Transparent Plans
No contracts. No hidden fees. Cancel anytime.
Call Forwarding
- 1 toll-free number with your choice of prefix
- 100 free inbound minutes per month
- Additional minutes at 5.9¢/min
- Auto attendant and voicemail included
- Call recording and virtual fax
- Interactive voice response (IVR)
- AI receptionist — add it for 15¢/min of talk time
eBizLine Lite
- 1 toll-free number per user
- Unlimited inbound and outbound calling
- Call forwarding at just 2¢/min
- Mobile and desktop softphone apps
- Auto attendant, voicemail, and call recording
- Lead management tools
- SMS text messaging and IVR
- AI receptionist — add it for 13¢/min of talk time
Business Phone Basic
- 1 toll-free number per user
- Everything in eBizLine Lite
- Call forwarding at 1.2¢/min
- Email, SMS, and workflow automation
- Microsoft Teams integration
- Advanced call analytics and reporting
- Priority support
- AI receptionist — add it for 10¢/min of talk time