
How to Route a DID to an Ingroup in eDialer
After purchasing and adding the DID or phone number to your eTollFree customer portal,
you are ready to route it to an ingroup. If you haven’t done that yet, check out our
previous tutorial on how to add a DID to eDialer. You can also
watch the video walkthrough for this tutorial ▶.
-
Go to your eDialer administration dashboard.
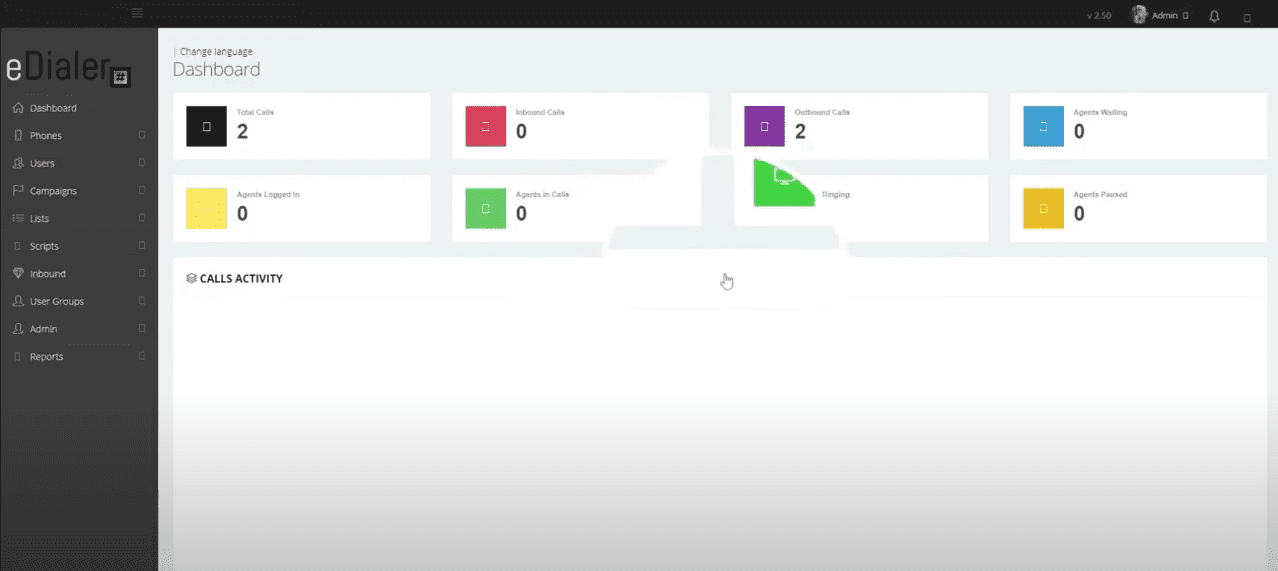
-
Navigate to Inbound > DIDs > Show DIDs.
-
Click Modify next to the DID you want to route to an ingroup.
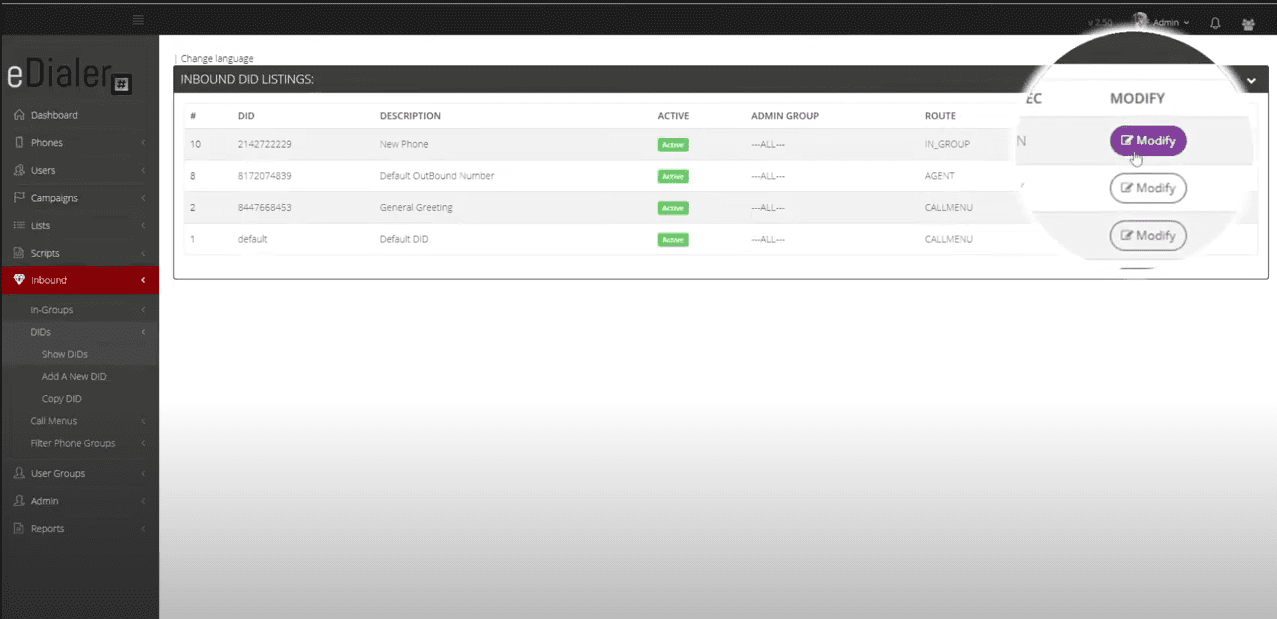
-
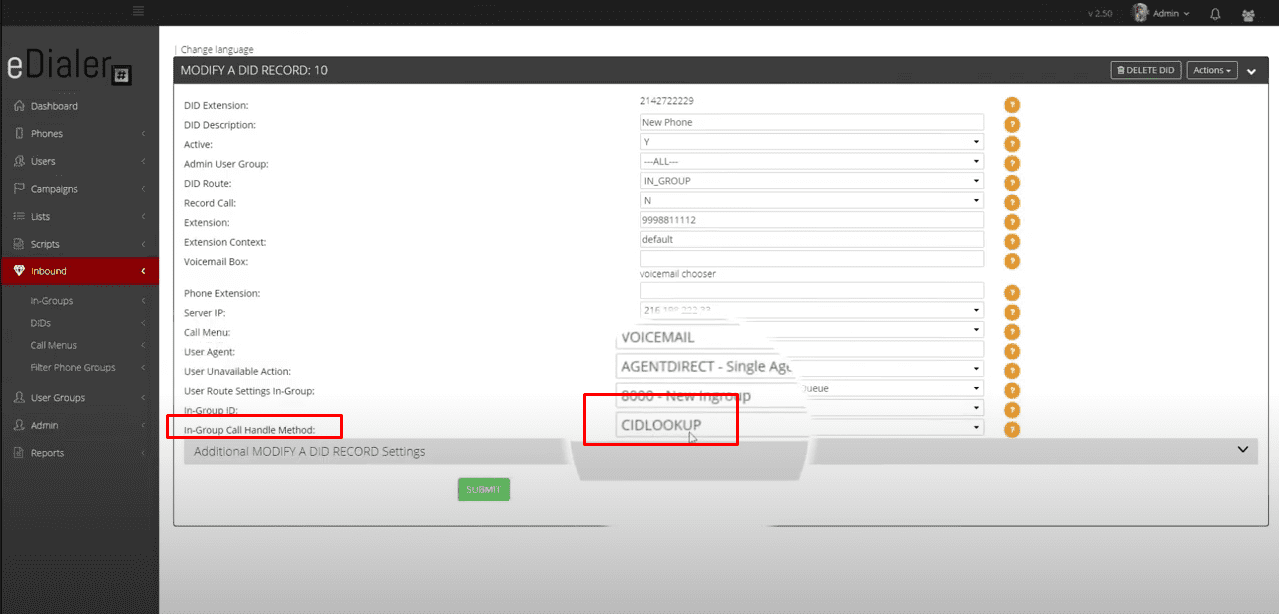
For DID Route, select Ingroup from the drop-down menu.
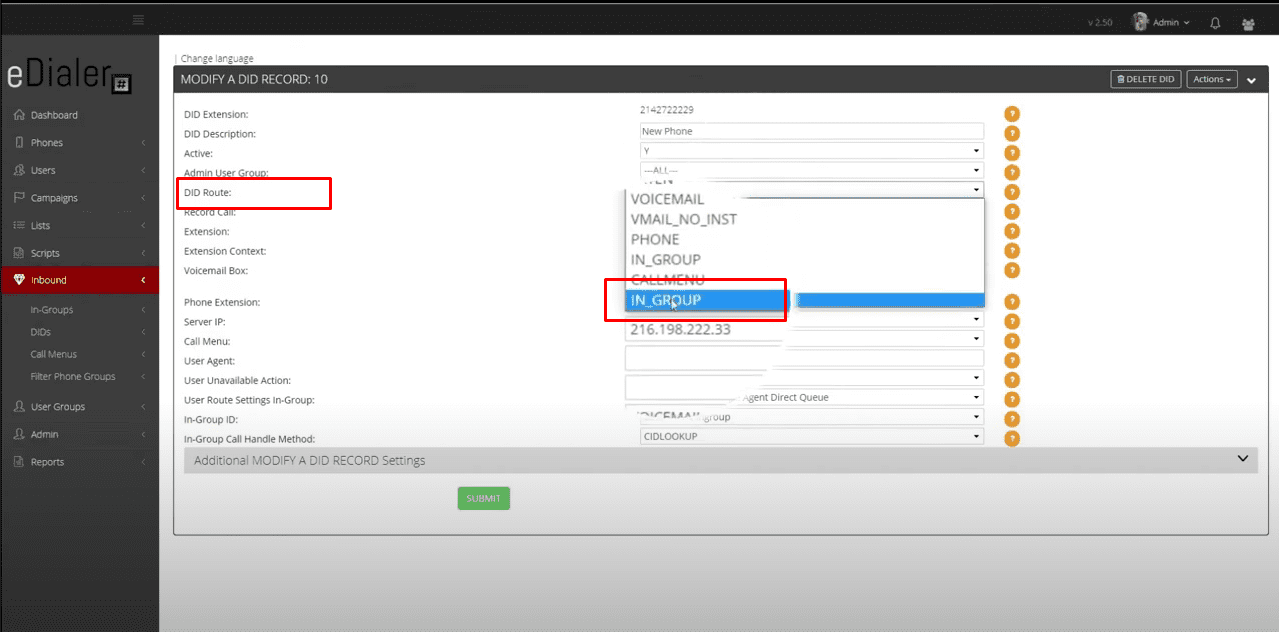
-
Under In-Group ID, choose the ingroup name you would like to route the DID or phone number to.
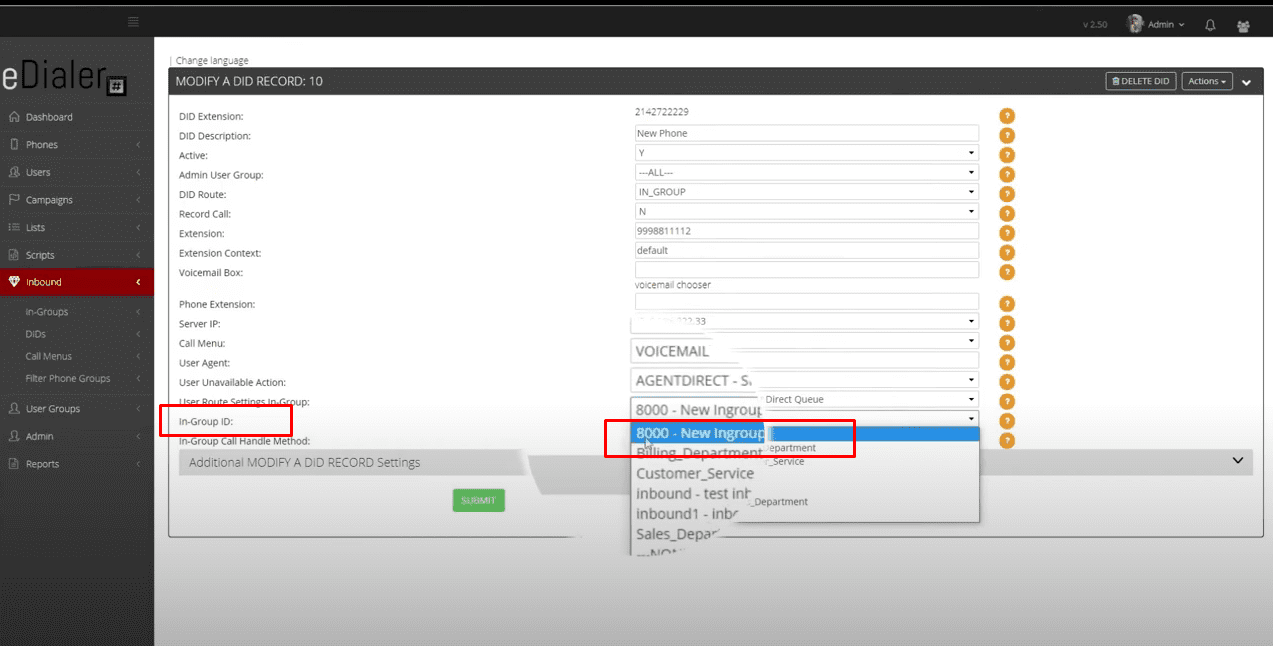
-
For In-Group Call Handle Method, choose the method best suited to your call-center setup.
-
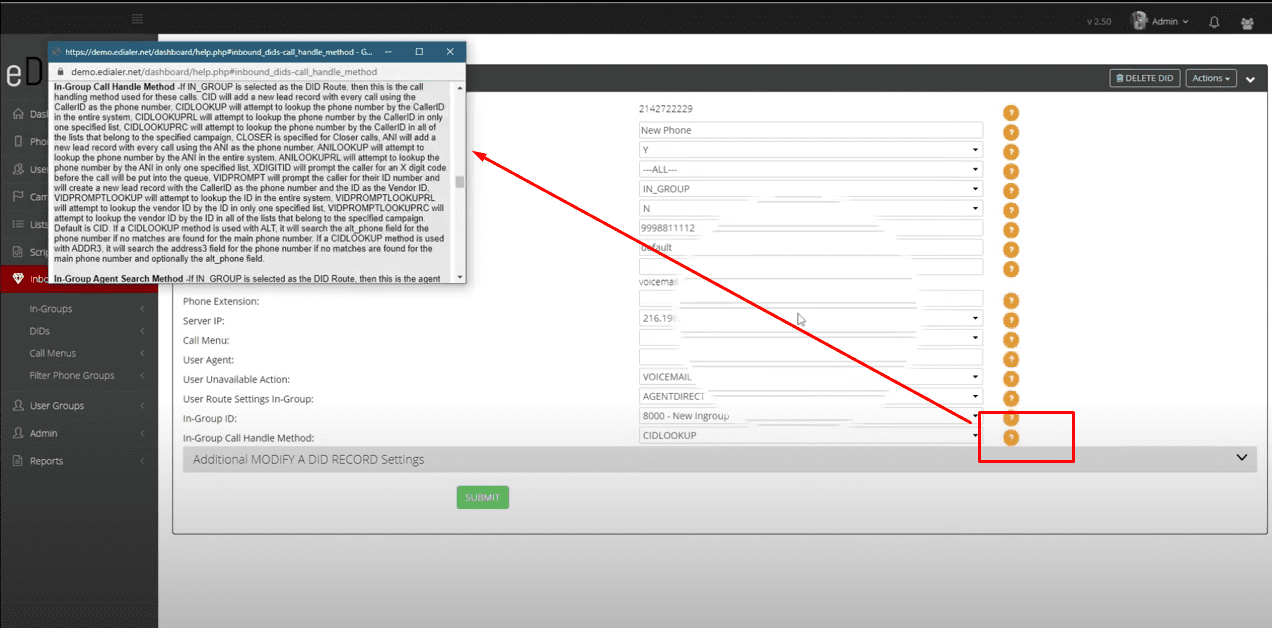
Click the circle with a question mark (?) icon next to any option to view its definition inline within the drop-down.
-
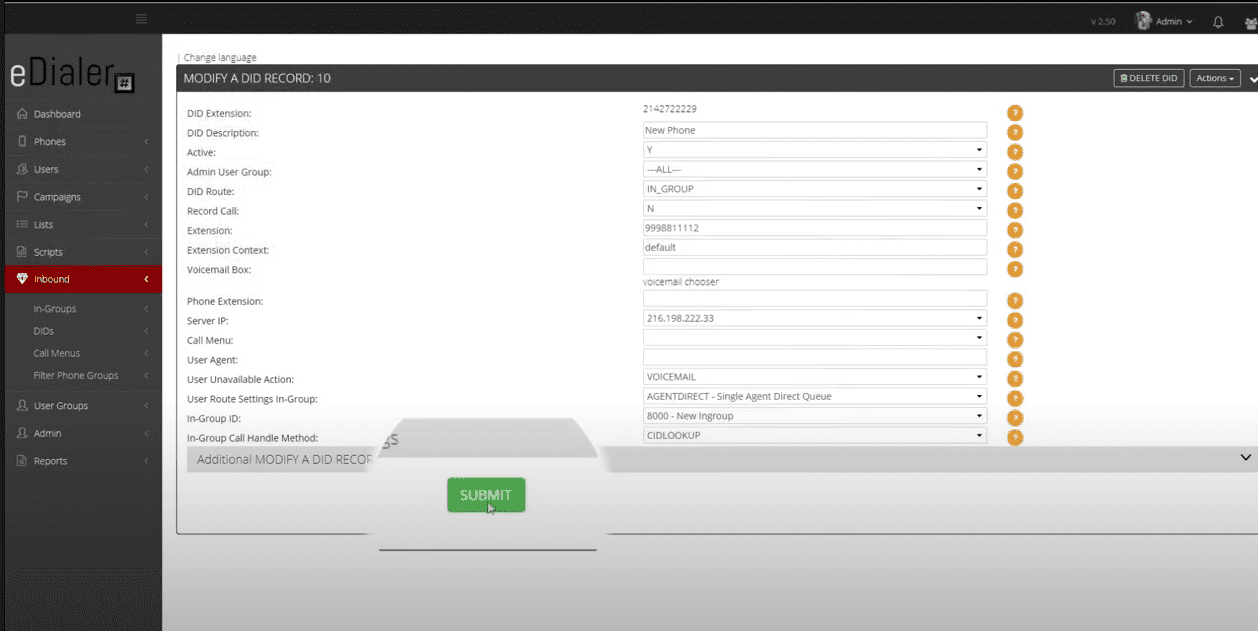
Click Submit to save your settings. The DID will now route inbound calls directly to your chosen ingroup.
Simple, Transparent Plans
No contracts. No hidden fees. Cancel anytime.
Call Forwarding
- 1 toll-free number with your choice of prefix
- 100 free inbound minutes per month
- Additional minutes at 5.9¢/min
- Auto attendant and voicemail included
- Call recording and virtual fax
- Interactive voice response (IVR)
- AI receptionist — add it for 15¢/min of talk time
eBizLine Lite
- 1 toll-free number per user
- Unlimited inbound and outbound calling
- Call forwarding at just 2¢/min
- Mobile and desktop softphone apps
- Auto attendant, voicemail, and call recording
- Lead management tools
- SMS text messaging and IVR
- AI receptionist — add it for 13¢/min of talk time
Business Phone Basic
- 1 toll-free number per user
- Everything in eBizLine Lite
- Call forwarding at 1.2¢/min
- Email, SMS, and workflow automation
- Microsoft Teams integration
- Advanced call analytics and reporting
- Priority support
- AI receptionist — add it for 10¢/min of talk time
Need Help Setting Up Your Hosted VICIdial Solution?
Our team is ready to assist you with configuration, routing, and everything in between.
Reach out any time:
- Customer Service: 866-273-4639
- Sales: 1 (800) 233-0234