
Need Help with VICIdial® Setup?
Let us help you save time and money — get started today! Check out our training videos and learn about VICIdial basics, inbound campaign setup, outbound campaign setup, call monitoring, reporting, and more. Please do not hesitate to contact us if you have any further questions or need assistance with training.
How to Upload Lead Lists to Your Predictive Dialer
This step-by-step tutorial shows you how to upload lead lists from the VICIdial Administration page. The screenshots below use our updated interface. You can follow along on our demo server at demo.edialer.net.
-
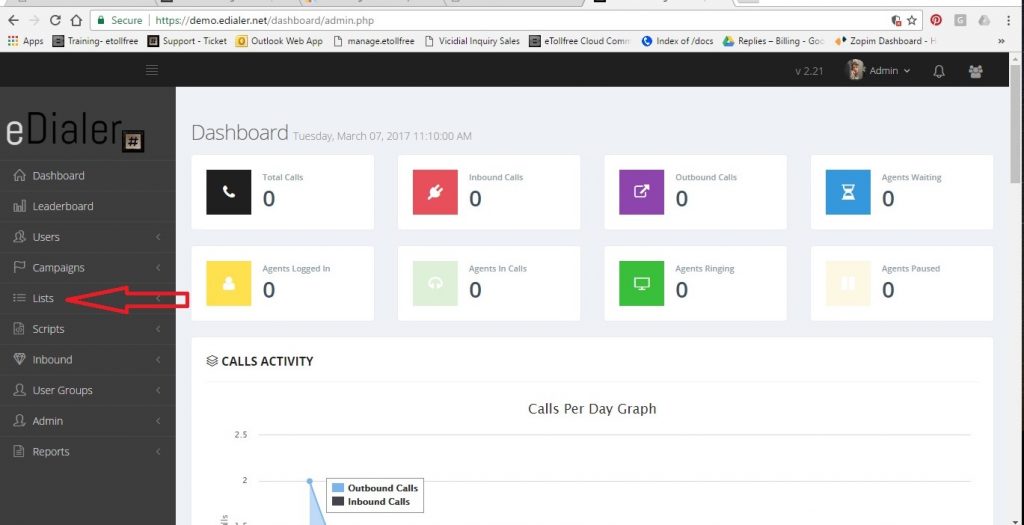
Open the Lists Menu
From the menu on the left side of the Administration page, click “Lists”.
-
Create a New List (if needed)
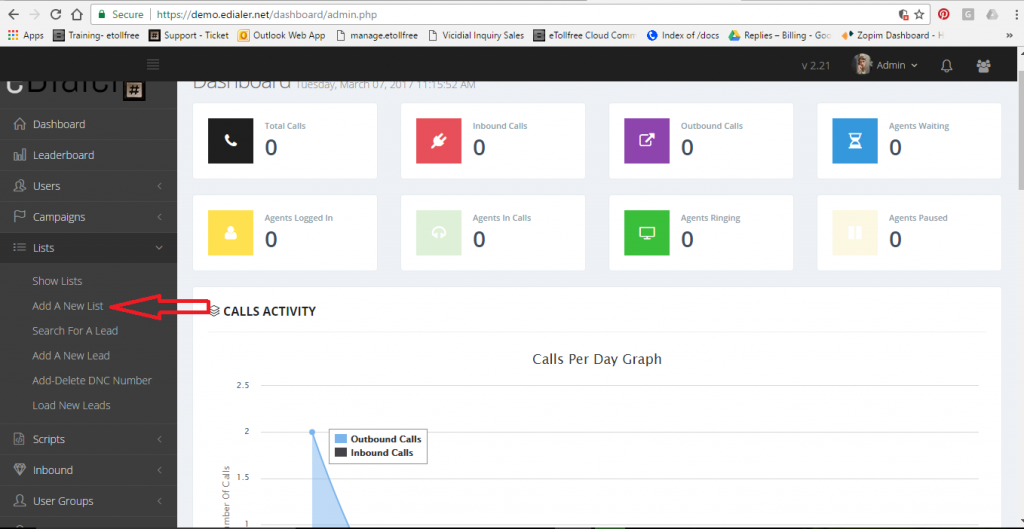
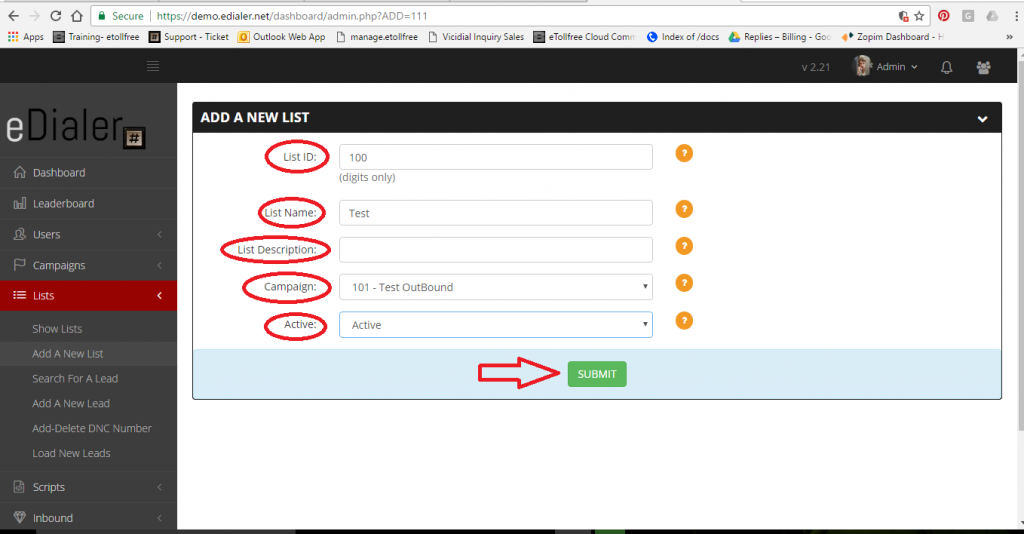
If you don’t have a list yet, create one by following these steps:
- Click “Add A New List”
- List ID: Any number greater than 99
- List Name: Assign a descriptive name
- List Description: Optional
- Campaign: Assign a campaign for the list
- Active: Make sure it is set to “Active”
- Click SUBMIT
-
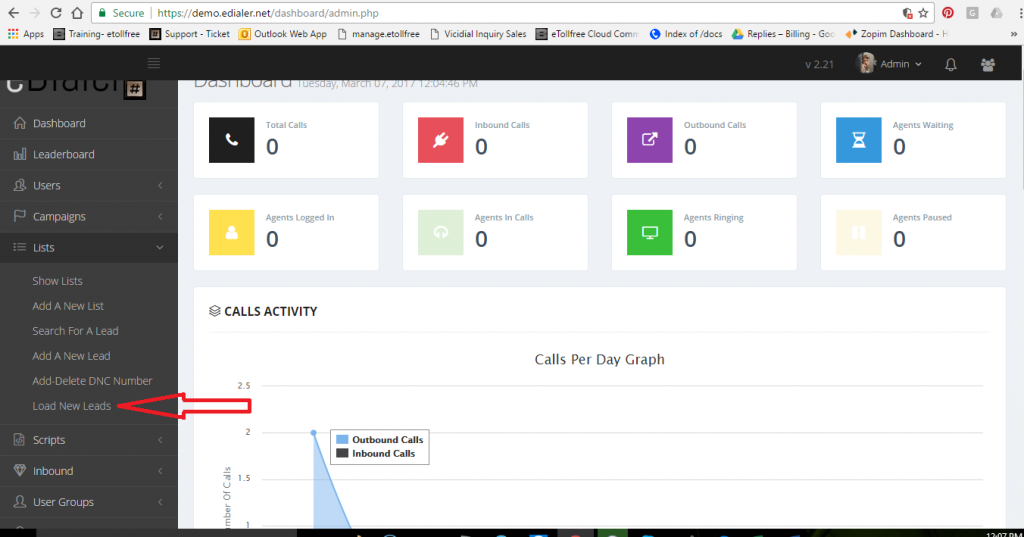
Load New Leads
If you have already created a List ID or have one ready, click on “Load New Leads”.
-
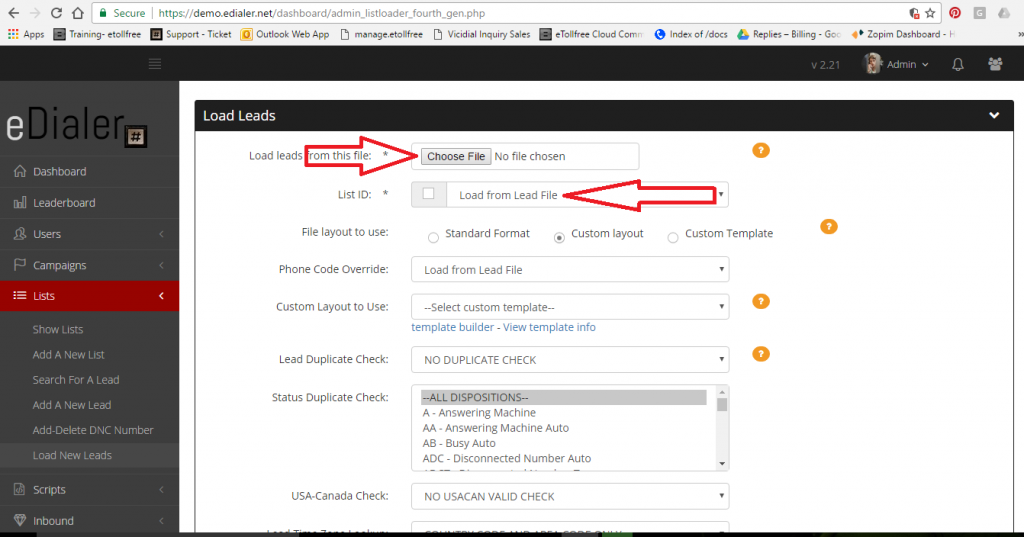
Configure the Uploader
From the uploader screen, set the following:
- Load leads from this file: Click “Choose File” — maximum 8 MB; accepted formats are
.csvor.xls - List ID: Select the List ID where you want to upload the leads
- Load leads from this file: Click “Choose File” — maximum 8 MB; accepted formats are
-
Submit the File
Leave all other fields at their default settings, then click Submit. You will be taken to the field-mapping screen.
-
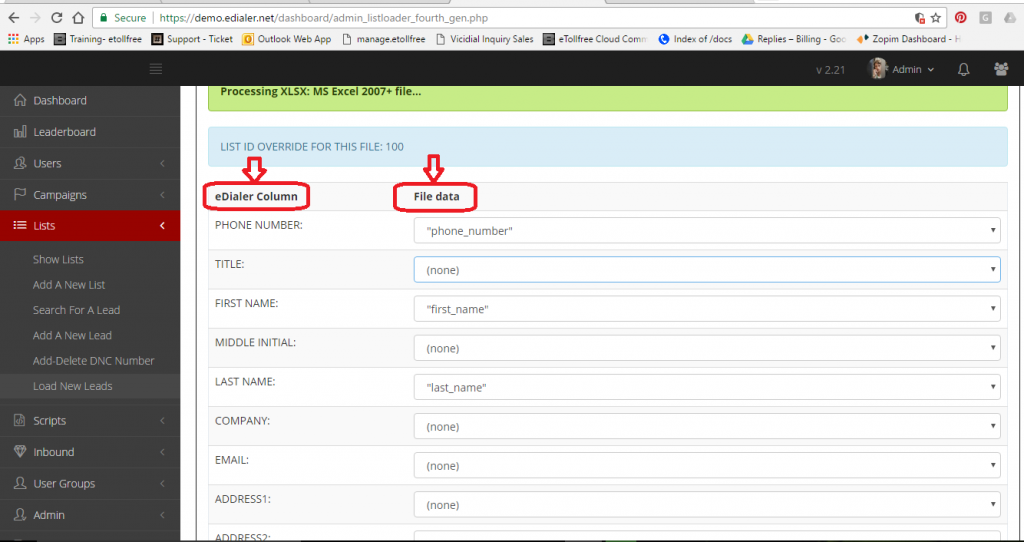
Map Your Spreadsheet Headers
Map the column headers from your spreadsheet file to the corresponding field labels on the left side of the mapping screen.
-
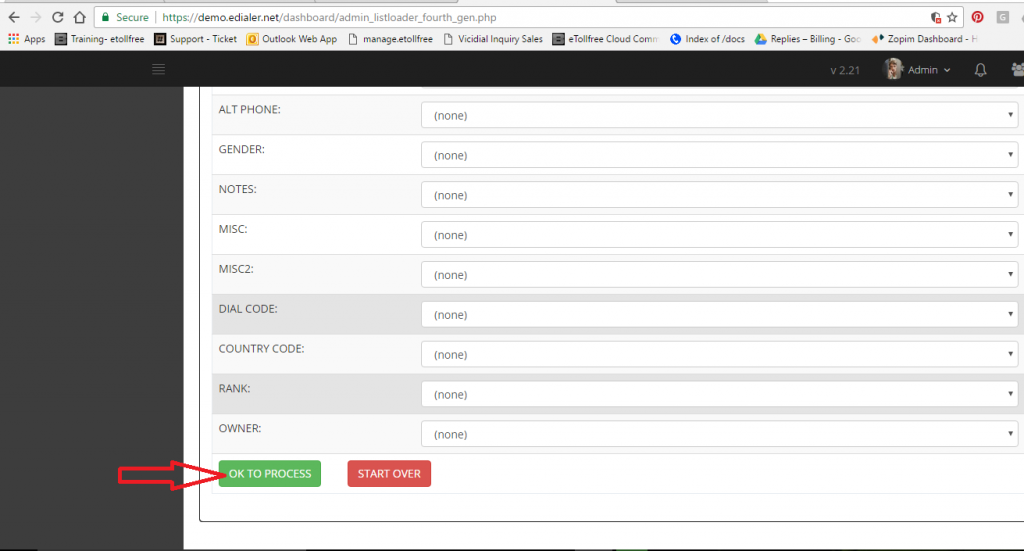
Process the Upload
Once you have finished mapping all fields, click “OK to Process” to continue uploading your leads.
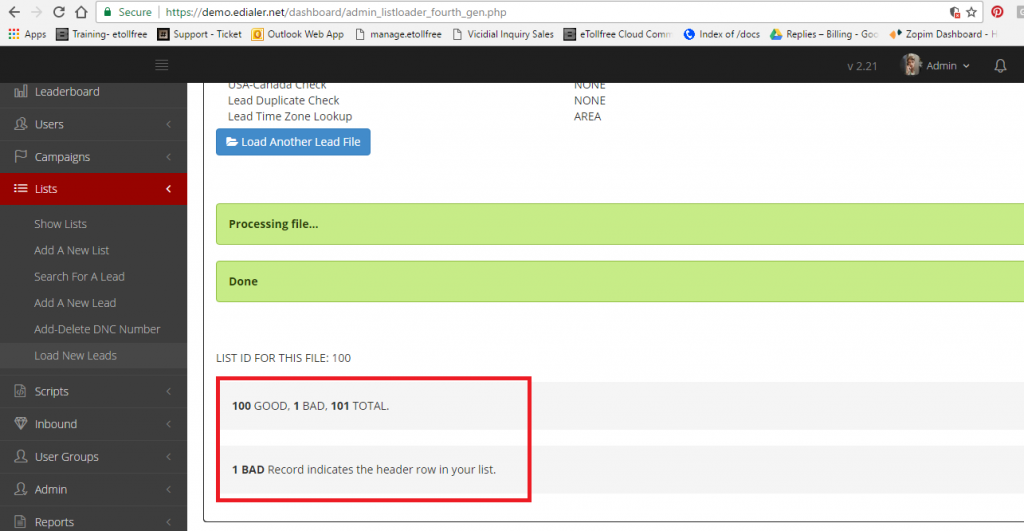
Note: Wait for the confirmation screen, which will display the number of good records, bad records, and total records uploaded.
Ready to Get Started?
Our team is here to help you configure your VICIdial system, set up inbound numbers, and review calling rates — contact us today.
Talk to Sales
Have questions or need a custom solution? Our sales team is ready to help.
Activate Inbound Numbers
Add toll-free or local inbound numbers to your VICIdial system in minutes.
View Calling Rates
Check out our competitive wholesale VoIP termination rates for outbound dialing.